Free receipt generator for contractors
Record a customer payment you've already received, with the amount, payment method, and work it covers. Print the receipt or download it as Word, Excel, or PDF.
Create a contractor receipt in three steps
Record the customer payment
Enter the amount received, payment method, and a description of the construction work or service the payment covers.
Complete the receipt details
Add your business and customer information, payment date, and company logo to create a clear record of the transaction.
Print or export your receipt
Review the payment details, then print the receipt, save it as a PDF, or download it as a Word or Excel file for your customer and business records.
What to include on a contractor payment receipt
An invoice asks the customer to pay. A receipt records a payment you’ve already received. For a homeowner who has paid for interior painting, a receipt should make it clear which work the payment covers, how much you received, and on what date.
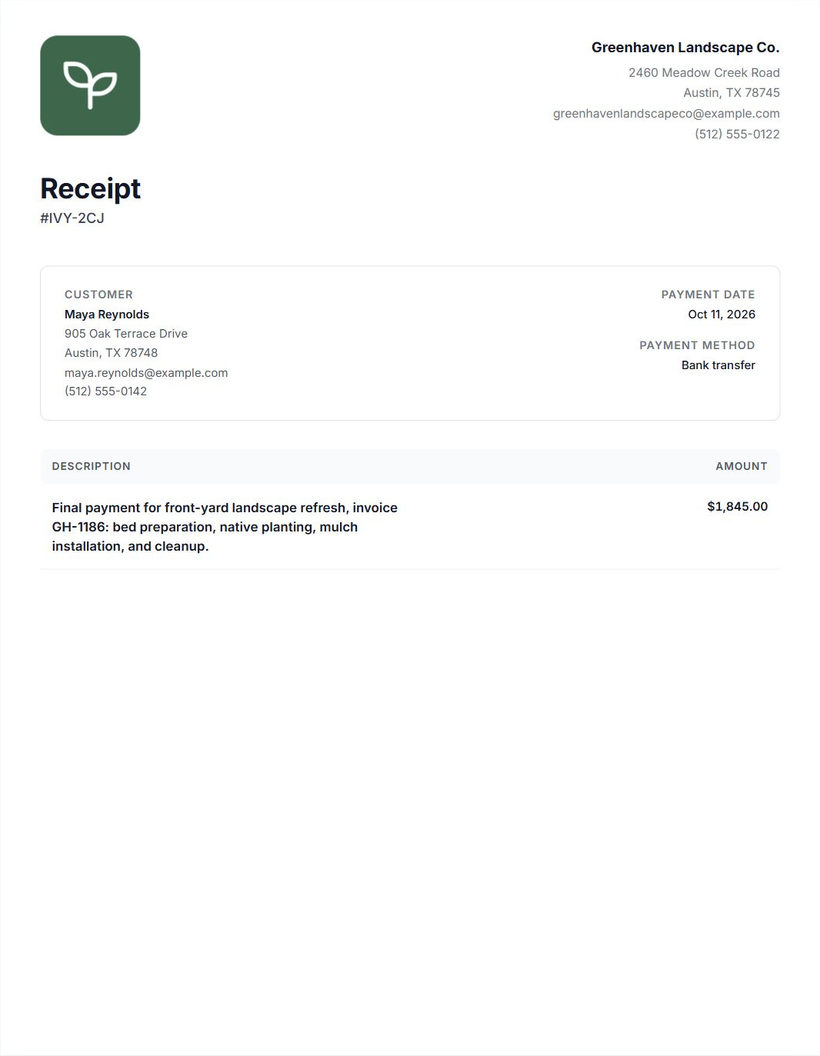
Contractor and customer information
In the full editor, add your business details and the customer’s name and contact information. Use the name associated with the payment. For work arranged through a property manager, check who paid before addressing the receipt.
Receipt number and payment date
The receipt preview displays a generated document number. Check that number when keeping or sharing your copy. If you also use your own receipt reference, put it in the description; there isn’t a separate editable reference field.
Set the payment date in the full editor to the date you received the payment. Don’t leave today’s default date when you’re documenting an earlier payment.
Amount received and payment method
Enter the amount of this payment, rather than the invoice total when those amounts differ. Select the method that matches your record: Cash, Credit card, Bank transfer, Bank check, or Other. Confirm payment using your own records before creating the receipt. Selecting a method doesn’t process or verify the payment.
Work description and job or invoice reference
For hourly work, keep the contractor timesheet with your billing records. Name the service and where it was performed, such as “Interior painting: living room and hallway at the Example home.” Add a job or invoice reference in the description if it helps the customer match the payment to the work. The reference doesn’t automatically link an invoice or update its status.
Partial payments
If the amount is a partial payment, say so in the description. The editor has no separate remaining-balance field or balance calculation. Keep the outstanding balance in your invoice or job records and check it separately before describing the payment as payment in full.
How to create and send a receipt
- Enter the payment amount. Use the amount you actually received for this payment.
- Choose the payment method. Select the method that matches your payment record.
- Describe the work. Name the service and add a job or invoice reference in the description where useful. Identify a partial payment clearly.
- Continue to the full editor. Your entries carry over into an initially unsaved draft.
- Add contractor and customer information. Complete your company details, add the customer, and set the payment date.
- Review the receipt. Check the customer, date, amount, method, description, and generated document number against your records.
- Print or export your receipt. In the full document preview, select Print to print a copy or save a PDF through your browser, or open More document actions to download a Word or Excel file.
- Send the customer a copy. Attach the PDF using your preferred email or messaging application. Keep an exported copy with your job records.
Saved documents stay in this browser on this device. The free generator doesn’t collect payments, verify transactions, automatically email receipts, or reconcile invoices and accounting records.
Common receipt mistakes
Issuing a receipt before confirming payment
Check your payment record first. An amount entered into a document is a statement you’ve written, not confirmation from a bank or card processor.
Recording the invoice total instead of the payment
If a customer pays $750 toward a larger invoice, enter $750. Don’t copy the full invoice amount into the receipt unless that is what you received.
Leaving the wrong payment date
Check the date before exporting, especially when preparing several receipts together. Use the date associated with the payment you’re documenting.
Giving too little detail about the work
“Painting payment” may be unclear to a customer with several projects. Name the rooms or service and include the job or invoice reference in the description.
Calling a partial payment payment in full
Describe the payment accurately. Check your invoice record separately before saying the entire amount has been paid.
Failing to keep a copy
Save an exported PDF with the job’s records and keep track of the receipt number. A browser-saved document may be lost if browser data is cleared and doesn’t sync to another device.
For a blank form to fill out by hand, use the contractor receipt template. Customize the company details and print the empty form before writing in the payment details.
Keep payments connected to your jobs
A free receipt is useful when you need to document a payment. Sending invoices and collecting payments across several jobs takes more organization.
With Cinderblock, you can create invoices, accept card and ACH payments, and keep billing information connected to the job and customer.
Frequently asked questions
More free tools for contractors
Invoice generator
Request payment with an itemized record of the work and charges.
Explore invoice generatorTimesheet generator
Keep the recorded hours behind an hourly bill with your payment records.
Explore timesheet generatorReceipt template
Prepare a blank payment receipt to print and fill out by hand.
Explore receipt template