
How to Price HVAC Service Calls
A tech spends 15 minutes diagnosing a bad capacitor and another 30 replacing it. The customer sees a quick repair and a part that didn’t cost much.
Your business paid for the drive, the repair, and the truck. That tech also spends paid time at the supply house and filling out paperwork between calls. Then there’s insurance and everything else it takes to keep the business running.
To price HVAC service calls, add up your labor, travel, parts, and overhead costs. Then set a price that leaves enough profit after those expenses.
A competitor’s service-call fee won’t tell you what yours should be. Their labor costs, travel times, and overhead could look nothing like yours.
What Should an HVAC Service Call Price Cover?
An HVAC service call usually starts with a technician going to a property to find out what’s wrong. Sometimes the customer only wants a diagnosis. Other times, the technician completes a repair while they’re there.
| Cost | What You’re Paying For |
|---|---|
| Technician labor | Wages, payroll taxes, workers’ comp, and benefits |
| Travel | Paid driving time and vehicle expenses |
| Diagnostic work | Troubleshooting, testing, and identifying the problem |
| Parts and materials | Replacement components and consumables |
| Overhead | Insurance, administration, software, and other business expenses |
| Profit | Money left after recovering the costs in your calculation |
One diagnostic fee can cover travel, troubleshooting, and the truck. You can build all those costs into a single customer charge.
How to Calculate HVAC Service Call Pricing
Start with your costs. Build the price from there.
Step 1: Calculate Your Actual Labor Cost
A tech making $30 an hour doesn’t cost you $30 an hour. Add employer payroll taxes, workers’ comp, and benefits, and the cost goes up.
Say those expenses add another $10 per paid hour.
$30 wages + $10 labor burden = $40 per paid hour
That’s your loaded labor cost. But you still have hours the company pays for that don’t end up on a customer’s job.
Your tech works an eight-hour day. Maybe five hours and 20 minutes are spent on assigned service calls, including travel. The rest goes to the supply house, loading the truck, and paperwork between jobs.
The company pays for all eight hours.
Daily labor cost = 8 × $40 = $320
Effective job-hour cost = $320 ÷ 5⅓ hours = $60 per hour
That $60 recovers the day’s labor cost across the hours assigned to customer jobs. It already accounts for the remaining paid time.
For our example, we’ll use $60 per job hour, including travel assigned to the call.
Run your own numbers through Cinderblock’s free Labor Cost Calculator. It helps calculate wages and employer labor burden. You’ll need to account for non-job hours separately when building your effective job-hour cost.
Step 2: Calculate Travel and Truck Costs
A service truck needs fuel, insurance, and maintenance. Eventually, it needs replacing.
Say you’ve worked out that each local service visit needs to recover $20 in vehicle costs.
That’s separate from the technician’s paid driving time, which we’ve already included in the $60 job-hour rate.
A call across town eats up more driving time than one around the corner. If you cover a large service area, account for that when setting your prices.
Step 3: Allocate Your Overhead
Someone has to answer calls, schedule appointments, handle billing, and keep the business running.
Suppose your annual overhead is $90,000 and you expect 3,000 productive job hours, including assigned travel time.
$90,000 ÷ 3,000 hours = $30 overhead per productive job hour
Every productive hour needs to recover $30 toward overhead.
A 45-minute diagnostic visit, including travel, gets $22.50 in overhead. A 30-minute repair gets another $15.
We’re counting assigned travel as productive time for overhead allocation. Use the same definition throughout your estimates. The $90,000 overhead figure also excludes labor and vehicle costs we’ve already counted separately.
Step 4: Add Parts and Materials
The part’s purchase price is only one expense. Shipping, pickup, and handling count too.
If you’re replacing a capacitor, use what your business actually pays for the component and any consumables. A part sitting in the truck still has a cost.
For the example below, we’ll use $35 for the capacitor and consumables.
If your tech needs a separate supply run, account for the extra time. An estimate that assumes the part is already in the truck won’t cover an unexpected hour at the supply house.
Step 5: Set Your Target Profit
We’ll use a 30% target margin after recovering all costs assigned to the call.
Selling Price = Estimated Cost ÷ (1 − Target Margin)
For a 30% target:
Selling Price = Estimated Cost ÷ 0.70
This margin counts the overhead you’ve allocated. Accounting gross margin often excludes those overhead expenses, so the two figures won’t necessarily match. Keep your definitions consistent when comparing jobs.
For a fuller explanation, read Markup vs. Margin for Contractors, or check your numbers with the free Markup & Margin Calculator.
HVAC Service Call Pricing Example: Diagnosis and Repair
July. The AC’s running, and the house is 81 degrees.
Your tech drives out, checks the system, and finds a failed capacitor. The customer approves the replacement, and the tech finishes the repair.
All figures below are fictional and demonstrate the pricing method. They’re not recommended HVAC rates or industry averages. The example assumes the part is already stocked on the truck.
Part 1: Price the Diagnostic Visit
The tech spends 30 minutes driving and 15 minutes diagnosing the problem.
That’s 45 minutes, or 0.75 job hours.
| Diagnostic Expense | Cost |
|---|---|
| Labor: 0.75 hours × $60 | $45.00 |
| Vehicle costs | $20.00 |
| Overhead: 0.75 hours × $30 | $22.50 |
| Total diagnostic cost | $87.50 |
At a 30% target margin:
$87.50 ÷ 0.70 = $125
Diagnostic fee: $125
If the customer declines the repair, you’ve charged for the work already done.
Part 2: Price the Repair
The tech has the replacement capacitor in the truck. The repair, including testing the system, takes another 30 minutes.
| Repair Expense | Cost |
|---|---|
| Labor: 0.5 hours × $60 | $30.00 |
| Capacitor and consumables | $35.00 |
| Overhead: 0.5 hours × $30 | $15.00 |
| Total repair cost | $80.00 |
At a 30% target margin:
$80 ÷ 0.70 = $114.29
Round the additional repair charge to $115.
The technician is already on-site, so there’s no second truck charge. The additional labor and overhead cover the repair time.
Part 3: Calculate the Total Price
The invoice:
| Customer Charge | Amount |
|---|---|
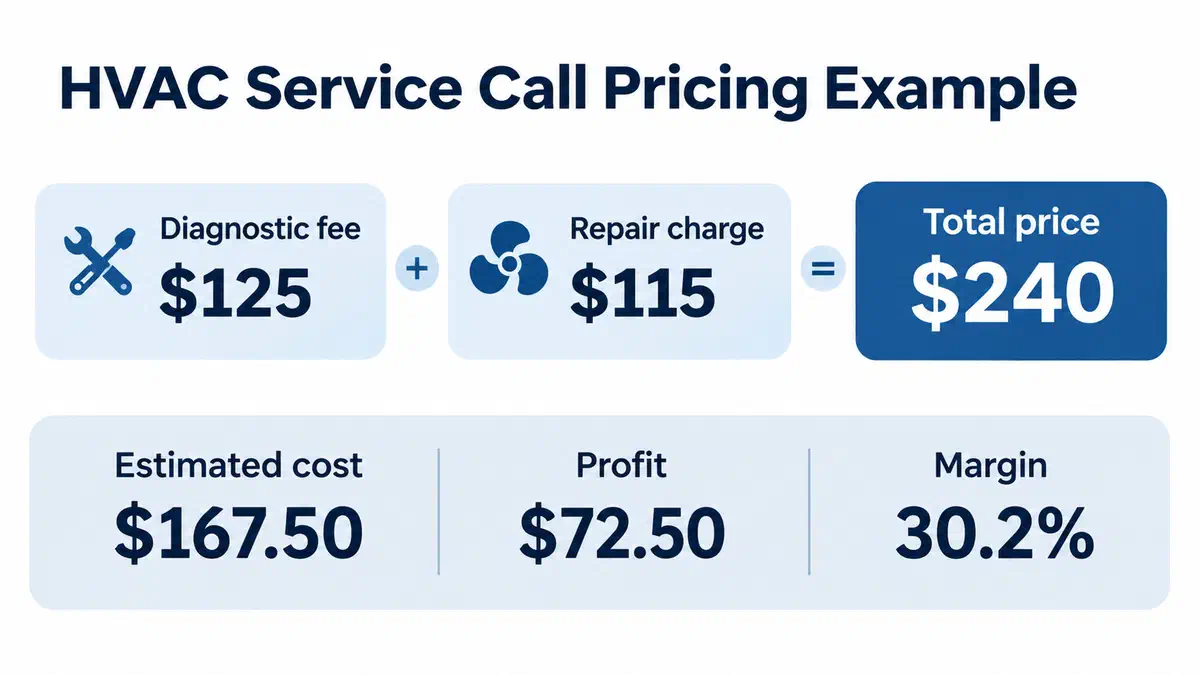
| Diagnostic fee | $125 |
| Additional repair | $115 |
| Total price | $240 |
The job costs:
| Job Result | Amount |
|---|---|
| Revenue | $240.00 |
| Labor | $75.00 |
| Vehicle costs | $20.00 |
| Part and consumables | $35.00 |
| Allocated overhead | $37.50 |
| Total estimated cost | $167.50 |
| Profit after included costs | $72.50 |
Margin = $72.50 ÷ $240 × 100 = 30.2%
The rounded prices put the job slightly above the 30% target.
These figures exclude any applicable sales taxes or additional charges. The actual result depends on the time spent and expenses incurred.
What Happens if You Waive the Diagnostic Fee?
Some HVAC shops credit the diagnostic fee toward a repair. Others waive or discount it for maintenance-agreement customers.
Fine. Run the numbers first.
In our example, the full job costs $167.50 and the customer price is $240.
Waive the $125 diagnostic fee without changing the repair price, and the customer pays $115.
$115 − $167.50 = −$52.50
You just lost $52.50 on a completed repair.
If you advertise free diagnostics with repair, the repair price has to recover the full cost of the visit. Otherwise, you’re giving a discount that comes straight out of your margin.
Maintenance agreements need the same calculation. A discounted diagnostic visit may be worthwhile if agreement revenue covers the expected service costs. Track what those visits cost before promising unlimited free diagnostics.
Flat-Rate vs. Time-and-Materials HVAC Pricing
The better pricing method depends on how predictable the work is.
Flat-Rate Pricing
With flat-rate pricing, you quote a set price for defined work before starting.
A capacitor replacement, standard maintenance visit, or common contactor repair can fit a flat-rate price when you know the usual labor and material costs.
The customer knows the price up front.
Some jobs take longer than expected. A component buried behind difficult access can turn a routine repair into a much longer visit.
Build flat rates from your actual job history and make the included scope clear.
Time-and-Materials Pricing
Time-and-materials pricing charges for labor and materials based on agreed rates and actual usage.
It works well when troubleshooting time is uncertain. An intermittent electrical fault can keep a tech testing circuits long after a simple component replacement would have been finished.
Tell the customer your labor rate, billing increments, and when you’ll ask for approval to continue.
Many HVAC shops combine the two methods: a diagnostic fee to identify the problem, followed by a flat-rate repair quote.
| Type of Call | Pricing Approach |
|---|---|
| Routine maintenance | Flat rate |
| Common component replacement | Flat rate |
| Initial troubleshooting | Diagnostic fee |
| Intermittent electrical problem | Diagnostic fee plus approved additional time |
| Repair with uncertain scope | Estimate after diagnosis or time-and-materials |
Get approval for the repair price before doing additional work.
Setting Diagnostic, Trip, and Emergency Fees
Diagnostic and Trip Charges
Your HVAC service call fee should cover the cost of getting a qualified tech to the property, finding the problem, and earning your target margin.
A single diagnostic charge can include the drive, truck expenses, and initial troubleshooting.
If you charge a separate trip fee, explain what it covers. Customers should know the charges before a truck is sent.
For longer-distance jobs, consider service-area zones or an additional travel charge based on the cost of reaching those properties.
After-Hours and Emergency Calls
A no-cooling call at 9 p.m. on a Saturday costs more to run.
You may have overtime wages or on-call compensation to pay. Keeping a technician available outside normal hours also has a cost.
Some contractors build emergency prices around those added expenses. Others charge a premium for after-hours availability and the convenience of immediate service.
Start with the cost of providing emergency service. Then decide what premium makes offering it worthwhile.
Tell the customer the after-hours fee before sending the technician. Specify whether it covers diagnosis only or includes repair work.
Return Trips and Callbacks
A special-order part arrives after the first visit. Your tech has to return to install it. Account for that second trip when pricing the work.
Then there’s the callback: the customer calls again because the original repair didn’t solve the problem.
Record the hours and costs of callbacks, even when you don’t charge the customer.
If techs keep returning to the same jobs, investigate. You could have a diagnosis problem, a workmanship issue, or labor allowances that are too tight.
Three HVAC Pricing Mistakes That Eat Into Profit
1. Marking Up the Part but Forgetting the Job
You buy a capacitor for $35 and sell it for $70.
That leaves $35 before paying for the tech, truck, and overhead.
It’s easy to look at the part markup and think the repair made good money. Then you check the total job cost.
The whole service call determines the profit.
2. Confusing Markup With Margin
A job costs $200, and you want a 30% margin.
Adding 30% markup gives you:
$200 × 1.30 = $260
That’s $60 above cost, but the margin is only 23.1%.
For a 30% margin:
$200 ÷ 0.70 = $285.71
That’s a $25.71 difference on one call.
At 15 calls a week, that gap amounts to roughly $20,000 in annual revenue over 52 weeks, assuming the same costs and number of calls. It also represents roughly $20,000 in additional profit after those unchanged costs.
3. Never Reviewing Completed Calls
Your price book allows 30 minutes for a certain repair.
Over the last month, the same repair has regularly taken 50 minutes. Maybe the equipment is difficult to access. Maybe your techs are doing more testing than the original allowance covered.
Your price is based on labor time you’re no longer hitting.
Compare estimated hours with actual hours. Do the same for parts and other expenses.
If you’re on Cinderblock’s Build plan, time tracking and job costing help you record what the work actually cost, including labor, materials, purchase orders, and manually entered costs. Those records give you a basis for adjusting prices when the original estimate misses something.
For a deeper breakdown, see our guide to Construction Job Costing.
Review Your HVAC Service Prices Regularly
You don’t need to rebuild your entire price book every week. Start with the calls you perform most often.
Look at diagnostic-only visits, capacitor replacements, contactor repairs, maintenance calls, and emergency work.
For each type, check:
- How much labor time did you allow?
- How much time did the tech actually spend?
- Were parts and vehicle costs close to your estimate?
- Did the job recover its share of overhead?
- What was left after those costs?
One unusual repair doesn’t mean you need to raise every price. But if the same type of job keeps running over its allowance, you have something to fix.
Check your prices again when wages, supplier costs, truck expenses, or overhead change.

Andrew Booth
Andrew is a construction industry writer focused on contractor operations, scheduling, estimating, and field workflows.


